lost-wax casting
I never tire of watching my bronze sculptures come alive during a pour.
The excitement begins when the solid bronze-ingots are melted and the liquid bronze is poured into one of my molds.
My long history of turning wax-images into bronze has been illuminating and challenging.
___________________________________________________________________________________________________________________________________________
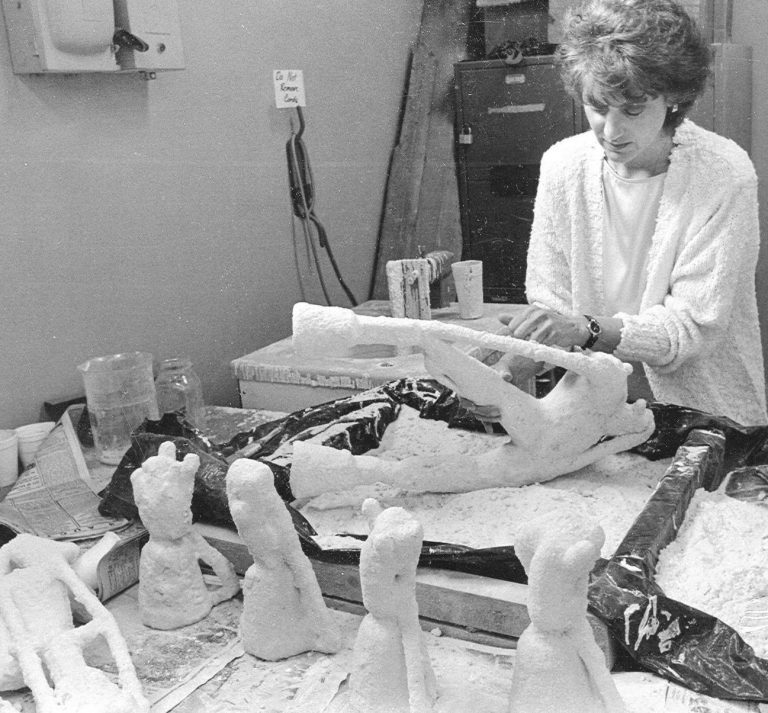
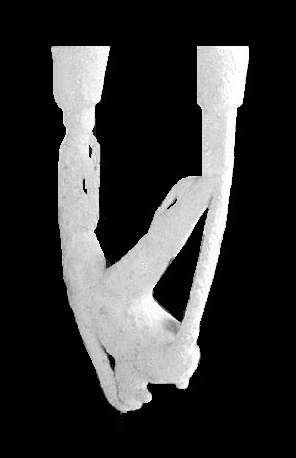
Ceramic-shell investment
1988 | Preparing Overte’ and smaller molds for a lost-wax casting
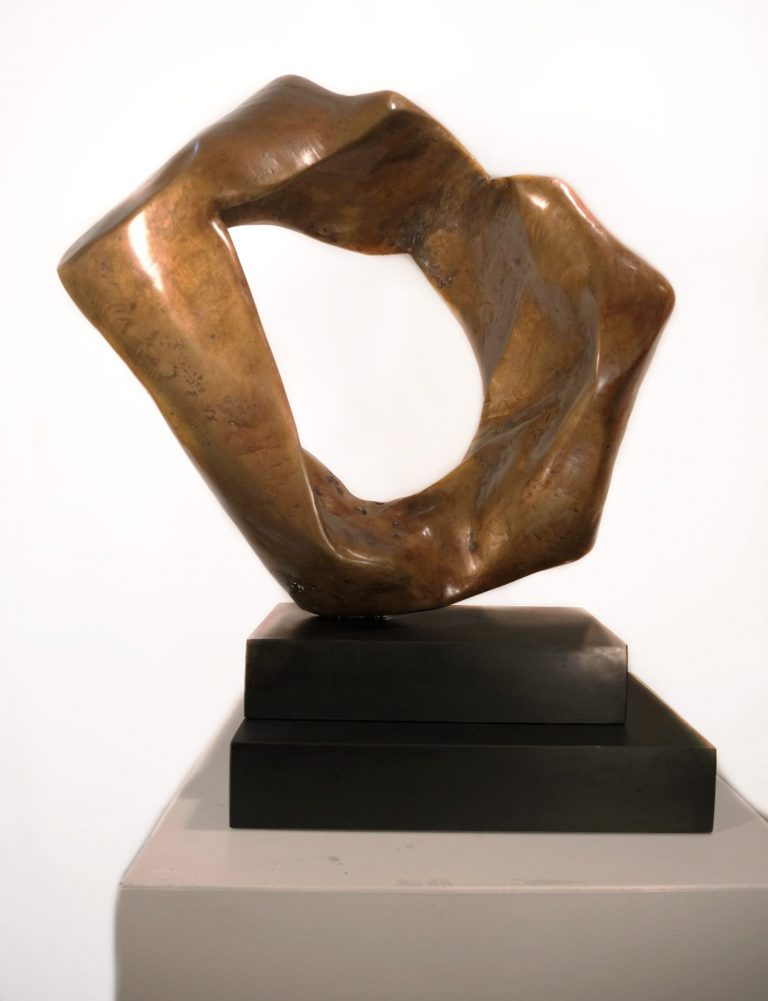
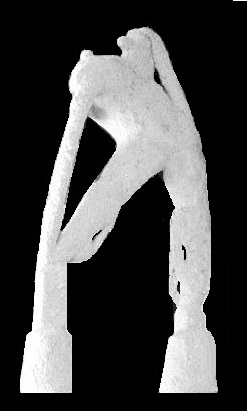
Sand-plaster investment
1982 | Balance | Gallery ready | 16″ x 16″ x 8″
___________________________________________________________________________________________________________________________________________
I was exposed to the lost-wax casting process in 1980, while earning a Masters degree at Towson University.
My 20-year career of creating bronze sculpture, was filled with unique techniques, tips, and tricks to make the process easier. I even found a method to successfully cast two cardboard abstract-images into bronze.
_________________________________________________________________________________
Anticipating the success of a pour is stressful. The completion of each step must be perfect. It only takes one misstep to negate all of the time, preparation, and cost I encounter during the process.
Worrying during a pour is inevitable, because I can not see the inside of the investment mold, in real time. Did the liquid bronze reach all areas of the image? Did the mold crack under the pressure? The answers to these questions are answered only after the pour and the molds are cooled.
Creating a sculptural image is only 1% of the lost-wax process. The other 99% is just plain hard work.
___________________________________________________________________________________________________________________________________________
1988 | Ceramic-shell Investment | Lost-wax process in 8 steps
Wax Unit = Image + Sprues
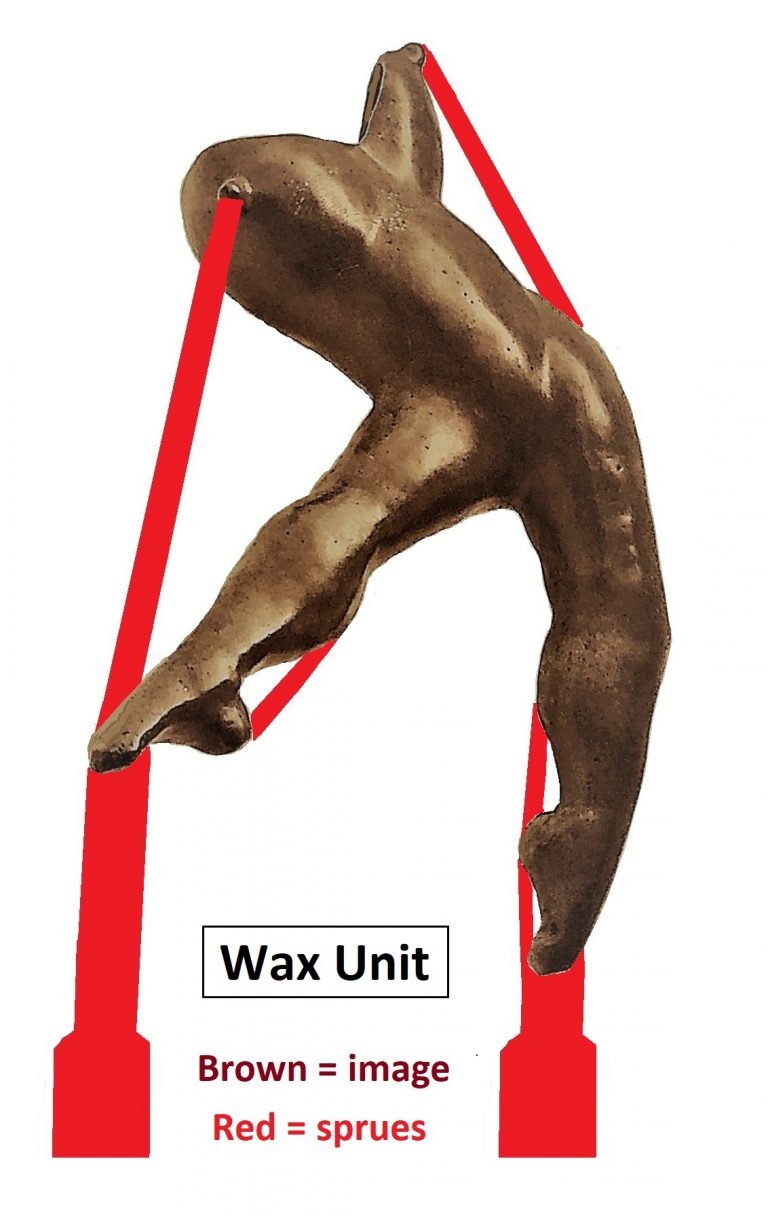
Step 1 | This diagram shows the Wax Unit (image with sprues attached) for Overte’. The Unit’s joints must be strong enough to withstand the challenges of the Lost-wax casting process.
Mold | Investment
Step 2 | The mold’s job is to protect the Wax Unit during the casting process. Here, the Unit is covered with an investment of silicon and ceramic mixture, to create a thin-shelled mold. When dry, the mold becomes fireproof.
The term LOST WAX is defined in this step.
Step 3 | The shell stands on its spouts in a large water-pan. A blow torch melts the wax in minutes, leaving the wax drippings in the pan, to be recycled. The silicon shell is now empty, leaving negative space inside the mold.
Prepping for the pour
Step 4a | The shell is moved to a kiln (oven) and placed on it’s spout, to lose left-over wax. 4b | The shell is turned upside-down (photo) and placed into the sandpit.
The Sandpit

Step 5 | Metal plates cover the pouring spouts to keep out any particles while the pit is tightly packed with sand. The molds stay warm in the pit until the ingots are melted.
The Crucible | Melting the Ingots
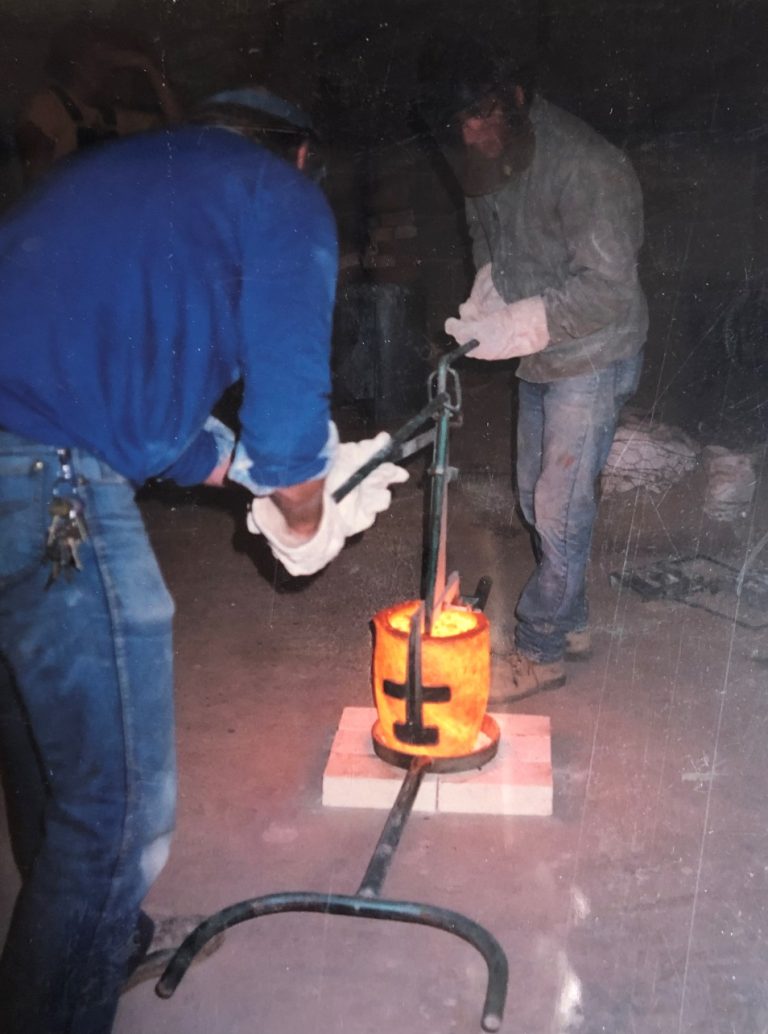
Step 6 | Ingots (solid-bronze bars) are melted. The red-hot crucible pictured was taken from the green furnace in the next photo. The bubbling liquid-bronze must cool a bit before the pouring can begin.
The Pour
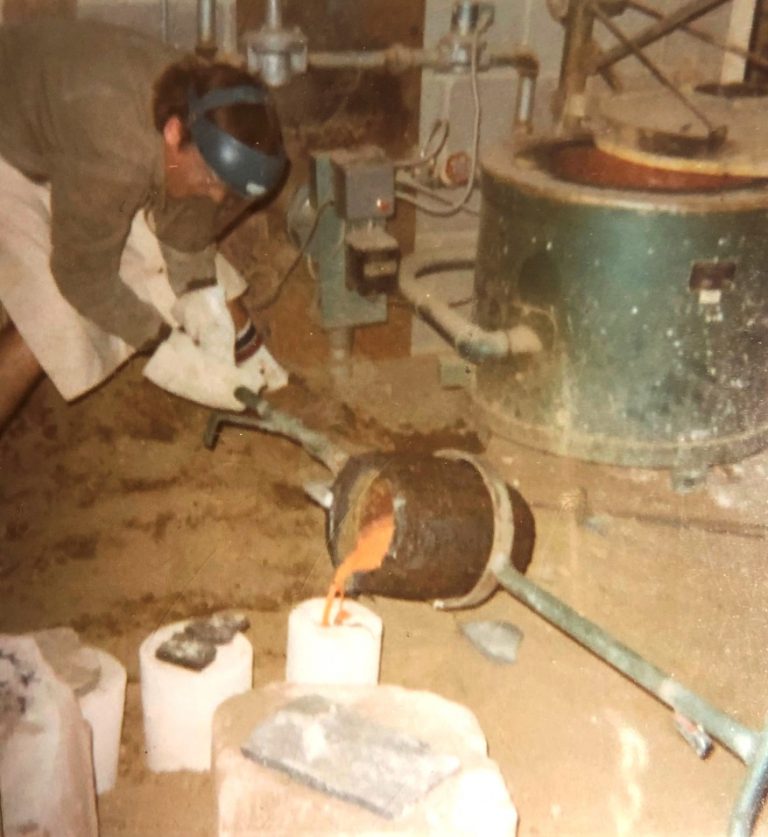
Step 7 | As the liquid bronze is slowly poured into each investment mold, students are wondering….Will the bronze reach all areas of the Unit? Will the shell come through without cracking? How much image-repair will be needed?
Step 8 | Cooling | Cleaning | Refining | Gallery-ready
After the pour: The mold cools for several hours. What was once a wax unit is now a bronze unit (artwork and sprues). Once the investment mold is chipped away, the bronze unit can be scrubbed down and the sprue system cut away.
After the sprue-system is removed: a sand-blaster removes most of the hard-to-reach investment particles. Then rough edges (burrs) are ground down and imperfections are repaired. The refining process depends on the desired surface finish; textured, smooth, or in-between.
To obtain an ultra-high surface-shine, expect to spend an enormous amount of time grinding (large to small electric grinders); sanding (various grits of sand paper on an electric sander, hand-held sanding-blocks, ultra to ultra-fine moist steel-wool); and polishing (polishing wheels using bobbin, whiting, and rouge sticks).
To prevent the sculpture from oxidation a patina (liquid chemicals) is applied, followed by melted paste-wax to stop the chemical reaction. Finally, the sculpture is Gallery ready.

After the pour: Drummer is seen halfway thru its cooling stages of reds, purples, blues, and gray.
______________________________________________________________________________________________________________________________________________
1980 | Sand-Plaster Investment | Lost-wax Casting
Balance | 1982 | 16″ x 16″ x 8″
Sand-plaster investment
In 1982, Towson University students did not know of the silicon-ceramic investment option. We were using a sand-plaster investment that was cumbersome, heavy, and messy.
Steps 1-3: The materials (ceramic-shell or sand-plaster) used for the investment mixture are the only differences in preparing a sculpture for a lost-wax pour.
Steps 4-8: The remaining five steps are basically the same, no matter which investment is used.
Sand-plaster:
Step 1: Complicated sprue network
Step 2: Investment creates a messy, heavy, and cumbersome mold
Step 3: Molds are put in a kiln for 3 days and 2 nights. Students take shifts to manage the kiln temperature as the wax slowly burns-out.
Ceramic-shell:
Step 1. Simple sprue system
Step 2. The investment is a thin shell that covers the sculpture and sprue unit.
Step 3. The shells are heated with a blow torch; the wax melts out in minutes into an open-air receptacle.
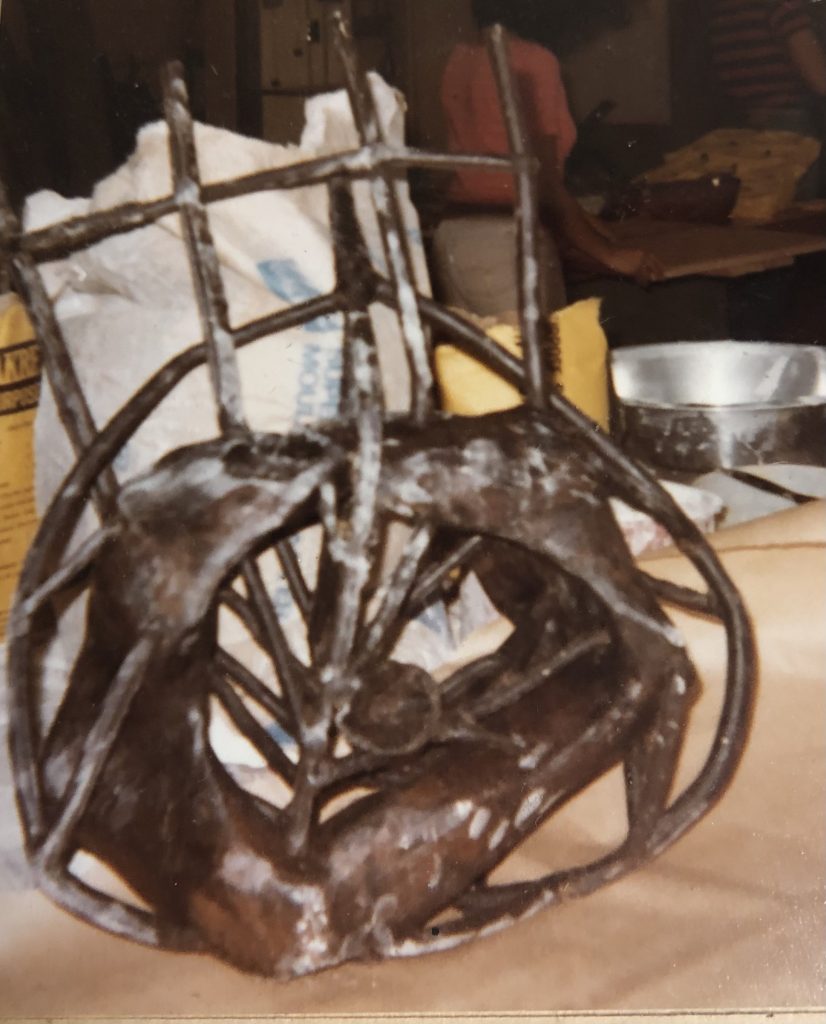
Step 1 | Image + Sprues = The Wax Unit
Balance’s shape called for a complicated sprue-system of gates, runners, and vents. The goal is to make a path for the liquid bronze to reach all areas of the piece.
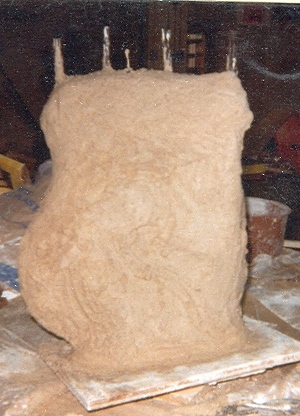
Step 2 | Mold | Investment

Balance is encased in a mold of sand-plaster investment. Thin layers coated the inside areas; thicker layers covered the outside layers.
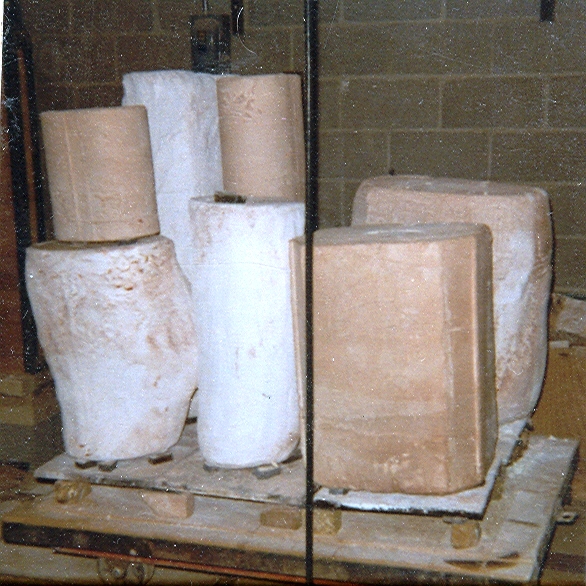
Step. 3 | Wax Burn-out | Kiln

Molds are placed upside-down in the kiln (oven). The temperature slowly builds to 1,200 degrees. It takes 3 days and 2 nights for the wax to drip out of the mold, leaving negative space.
__________________________________________________________________________________________________________________________________________
Archaeologists have found many examples of lost-wax casting, dating back 6,000 years. The process is still used world-wide. The most common metals for casting are bronze, gold, and silver.
The J. Paul Getty collection counts among the world’s finest for their quality, rarity, and historic interest. To the right are Lioness and Nigerian Vessel, from Getty Images online.
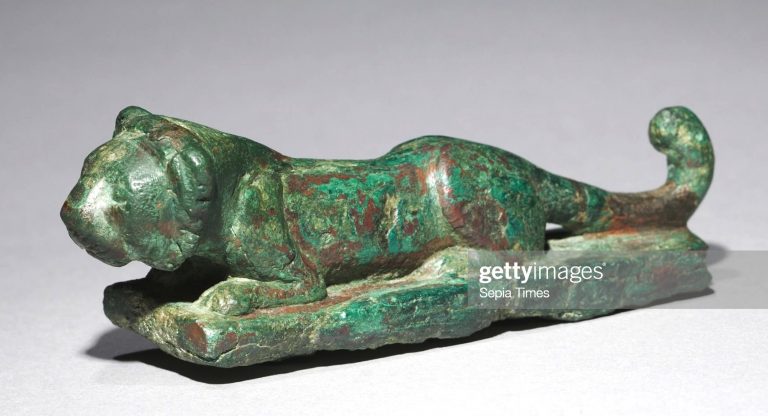
c. 2100 BC | Lioness | Iraq |
copper alloy | lost-wax casting
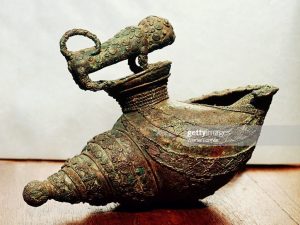
9th century AD | Nigerian vessel |
bronze lost-wax casting